| .. | ||
| Demo Programs | ||
| PySimpleGUIQt.py | ||
| readme.md | ||
PySimpleGUIQt
"Qt without the ugly"
The Alpha Release Version 0.13.0
Announcements of Latest Developments
----- ## Getting Started with PySimpleGUIQt
Welcome to the Alpha Release of PySimpleGUI for Qt!
You can use the exact same code that you are running on the older, tkinter, version of PySimpleGUI.
PySimpleGUIQt uses PySide2 OR PyQt5 for access to Qt.
Porting your PySimpleGUI code to PySimpleGUIQt
To "port" your code from the tkinter implementation. Follow these steps:
- Change
import PySimpleGUItoPySimpleGUIQt
That's it! OK, maybe I should have said step instead of steps.
Differences between PySimpleGUI and PySimpleGUIQt
Sizes
While you can use "Character-based" sizes like you did in tkinter, it's best to use pixel based sizes as that is what Qt uses. PySimpleGUIQt does some very rough / basic conversions from the character sizes to pixel sizes. It's enough that your elements will at least be visible. But the conversion is likely to not be ideal.
Fonts
Fonts should be in the format (font family, size). You can use the older string based too, but it will not work with setting like bold and italics. PySimpleGUIQt converts from the string 'Courier 20' to the tuple ('Courier', 20) for you.
Installing PySimpleGUIQt for Python 3
pip install --upgrade PySimpleGUIQt
On Linux systems you need to run pip3.
pip3 install --upgrade PySimpleGUIQt
Installing PySide2 or PyQt5 for Python 3
It is recommended that you use PySide2, however, if that cannot be found, then PyQt5 will be attempted. To install either of these:
pip install PySide2
or
pip install PyQt5
Testing your installation
Once you have installed, or copied the .py file to your app folder, you can test the installation using python. At the command prompt start up Python.
 python3
 >>> import PySimpleGUIQt
 >>> PySimpleGUIQt.main()
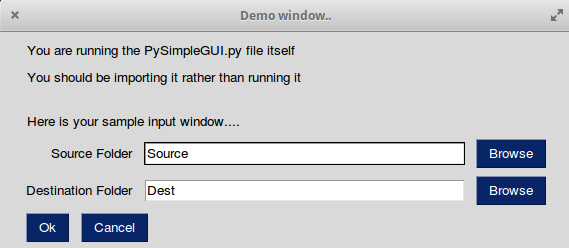
You will see a sample window in the center of your screen. If it's not installed correctly you are likely to get an error message during one of those commands
Here is the window you should see:
Prerequisites Python 3
PySide2 or PyQt5
Using - Python 3
To use in your code, simply import....
import PySimpleGUIQt as sg
Then use the exact same code as any other PySimpleGUI program that runs on tkinter.
Status
FEATURE COMPLETE!
All of the major features are DONE. They may not have all of their options working, but they can be added to your windows. It's been an amazing week to get here.
I hope you enjoy this ALPHA release! Please post a screenshot on the GitHub site. There is an Issue where users have been posting their applications. It's a place for you to show-off and a place for others to learn from your designs. Your window does not have to be complex.... all GUIs, no matter how simple, are something we can learn from.
Functioning features
Features are being added daily to this Qt port of PySimpleGUI.
These Elements are "complete" (a relative term... more are more complete than others):
- Text
- Input single line
- Input multiline
- Output multiline (new)
- Dial (new)
- Output - reroute stdout
- Spinner
- Sliders
- Buttons - RButtons, CButtons, Short-cut Buttons
- Checkbox
- Radio Buttons
- Listbox
- ComboBox
- Labeled Frames
- Columns - enables you to make pretty much any layout!
- Alpha channel for windows
- No Title Bar setting
- Enter submits for multiline
- Fonts
- Colors for text and background
- Timeouts for Read calls
- Change Submits parameters for most Elements
- Table
- Basic display
- Read selected rows
- change_submits events
- Updates
- Image as a background (new feature)
- Graph - Draw line, draw circle, draw text
- Image Element
- Tree Element
- Tabs
- Menus
- Menu Button Element
Missing Features
Notable MISSING features at the moment include:
- Graphs Element Methods - erasing, draw arc, etc
New PySimpleGUI Features
There are a number of new features that are only available in PySimpleGUIQt. These include:
- ButtonMenu Element
- Dial Element
- Stretcher Element
- SystemTray feature
SystemTray
In addition to running normal windows, it's now also possible to have an icon down in the system tray that you can read to get menu events. There is a new SystemTray object that is used much like a Window object. You first get one, then you perform Reads in order to get events. In this case the only events you'll receive are menu selections and timeouts.
Here is the definition of the SystemTray object.
SystemTray:(title, filename=None, menu=None, data=None, data_base64=None):
        '''
 SystemTray - create an icon in the system tray
 :param title: Not currently used.  A placeholder / name reminder
 :param filename: PNG/ICO/? file that will be used for icon
 :param menu:
 :param data: In-RAM image to be used for icon
 :param data_base64: Base64 data to be used for icon
         '''
You'll notice that there are 3 different ways to specify the icon image. The base-64 parameter allows you to define a variable in your .py code that is the encoded image so that you do not need any additional files. Very handy feature.
System Tray Design Pattern
Here is a design pattern you can use to get a jump-start.
This program will create a system tray icon and perform a blocking Read. If the item "Open" is chosen from the system tray, then a window is shown on the screen.
import PySimpleGUIQt as sg

menu_def = ['File', ['&Open', '&Save',['1', '2', ['a','b']], '&Properties', 'E&xit']]

tray = sg.SystemTray('My Tray', menu=menu_def, filename=r'default_icon.ico')

while True:
    menu_item = tray.Read()
    if menu_item is not None: print(menu_item)

    if menu_item == 'Exit':
        break
 if menu_item == 'Open':
        window = sg.Window('My win').Layout([[sg.Text('My layout')]])
        event, values = window.Read()
        print(event, values)
SystemTray Methods
Read - Read the context menu
def Read(timeout=None):
    '''
 Reads the context menu
 :param timeout: Optional.  Any value other than None indicates a non-blocking read
 :return:   String representing meny item chosen. None if nothing read.
    '''
Hide
Hides the icon
def Hide():
UnHide
Shows a previously hidden icon
def UnHide():
ShowMessage
Shows a balloon above the icon in the system tray area
def ShowMessage(title, message, filename=None, data=None, data_base64=None, time=10000):
    '''
 Shows a balloon above icon in system tray
 :param title:  Title shown in balloon
 :param message: Message to be displayed
 :param filename: Optional icon filename
 :param data: Optional in-ram icon
 :param data_base64: Optional base64 icon
 :param time: How long to display message in milliseconds
 :return:   self (for call chaining)
    '''
Release Notes:
0.12.0 - 20-Nov-2018
Correctly restore stdout when Output Element is deleted
Added Finalize ability
Better multi-window handling... maybe it's finally fixed!
Radio button default value
Dial element default value
Show expanded option for trees
Titles for popups
0.13.0 - 22-Nov-2018
Focus for Input Text and Multiline Input
-
Get focus
-
Set focus Window.FindElementWithFocus works Multiline input
-
Change submits
-
Update - disabled, append
Multiline output - Update value, append, disabled, get value Text clicked submits File types for open files Initial folder, file types, for browse buttons File types standardized on tkinter data format Find Element With Focus now works for input and multiline input Yet more multiwindow handling Relief for Text element Input text disable Correct sizing of Comboboxes using visible items parm Correct default values for input and multiline input Change submits for multiline Horizontal and Vertical separators PopupGetFile and PopupGetFolder - no_window option works
0.14.0 - 24-Nov-2018
Slider tick positions set using relief parm ButtonMenu Element Multiline.Update font parm Text.Update color and font now work Button.Update font support Window.Element = Window.FindElement Better font support for all elements - underline, bold Element padding - complete rework Text element padding Button padding Input Text padding Input Text password char Listbox padding Combobox padding Multiline padding Checkbox padding Radio padding Progress Bar padding Output padding Image padding Graph padding Slider - set tick marks using relief parm Dial - set tick information using resolution and tick interval Table padding Tree padding Separator padding Force window sizing should mean windows are better sized Popup - better layout
0.15.0 24-Nov-2018
New SystemTray feature! margin paramter for Text Element. Takes 4 ints Corrected button colors when disabled. For now am restoring them to original colors Border Depth for all elements that support it (inputs, slider, table, tree, etc) Fix for Element padding done incorrectly!! Sorry about this one
Design
Author
Mike B.
Demo Code Contributors
License
GNU Lesser General Public License (LGPL 3) +


